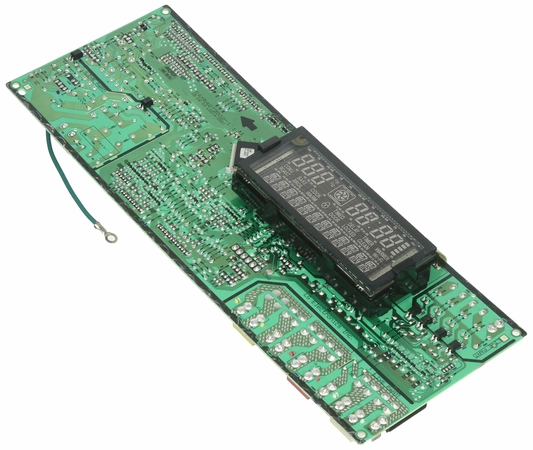
EBR77562706 LG Main PCB Assembly

The LG EBR77562706 PCB Assembly We're your #1 source for genuine OEM appliance parts. Contact us for further questions as well as any other appliance parts needs!
Weight : 2.51 lbs
Package Dimension : 13.78 x 6.57 x 3.86
The LG EBR77562706 PCB Assembly We're your #1 source for genuine OEM appliance parts. Contact us for further questions as well as any other appliance parts needs!
Weight : 2.51 lbs
Package Dimension : 13.78 x 6.57 x 3.86
Please Verify Your Purchase to Submit a Review
Replacing the LG EBR77562706 PCB Assembly,Main:
A Step-by-Step DIY Guide
Are you looking to replace your LG EBR77562706 PCB Assembly,Main? Upgrading your device is easy and requires only basic tools. Before you start, be sure to disconnect your device from the power source and wear protective gear to avoid personal injury. Now follow the steps below to successfully complete the repair.
1. Prepare Your Device – Lay out your device on a flat surface and remove any screws attaching the housing to the body. Slowly and gently pull off the housing to reveal the internal components.
2. Disconnect Wiring – Disconnect all wiring attached to the LCD panel and note their exact locations for reattachment later.
3. Remove Old PCB Assembly – Unscrew the screws that secure the old LG EBR77562706 PCB Assembly in place. Carefully remove the assembly and set aside.
4. Install New PCB Assembly – Place the new LG EBR77562706 PCB Assembly into the chassis and secure it with the screws you removed earlier.
5. Reconnect Wiring – Reconnect all wiring to the board exactly as they were before you removed the old one.
6. Replace The Housing – Replace the housing and secure it with the screws.
7. Test and Power On – Reattach the power source and test the device. If everything is working properly, you’re done.
Congratulations, you just replaced your LG EBR77562706 PCB Assembly,Main! With some patience and attention to detail, you can easily upgrade your device by following these steps. For more information, please consult your device’s user manual or contact an authorized service center.
Please keep in mind, these instructions are for general guidance and should always be used in conjunction with the manufacturer's manual, if available.
No more associated models for this part.


