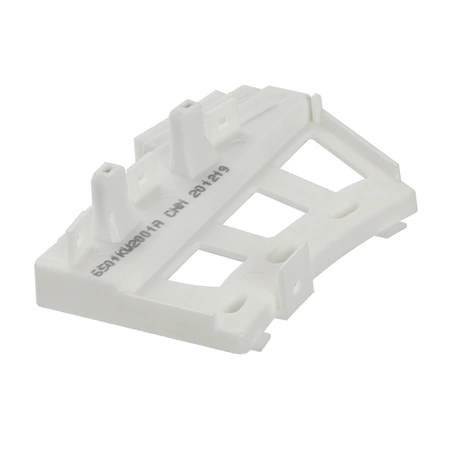
6501KW2001B LG Sensor Assembly

Maintain your washing machine with the 6501KW2001B sensor assembly, designed specifically for LG Electronics appliances. This essential component enhances your washer's performance by accurately measuring temperature and ensuring optimal functioning. Crafted with quality in mind, it guarantees durability and reliable operation, making it a crucial investment for maintaining your appliance's efficiency.
Compatible with various LG washer models, this part is easy to install, allowing you to restore your machine to its peak performance without hassle. Trust in this dependable sensor assembly to keep your laundry process smooth and effective. Whether you're a DIY enthusiast or a professional technician, this high-quality thermistor will meet your needs and exceed expectations. Keep your appliance running efficiently with the right replacement part.
Weight : 0.16 lbs
Package Dimension : 3.78 x 2.72 x 2.17
Product Details
Reviews
Replaces Parts
Installation Instructions
Compatible Models
Compatible Brands
Maintain your washing machine with the 6501KW2001B sensor assembly, designed specifically for LG Electronics appliances. This essential component enhances your washer's performance by accurately measuring temperature and ensuring optimal functioning. Crafted with quality in mind, it guarantees durability and reliable operation, making it a crucial investment for maintaining your appliance's efficiency.
Compatible with various LG washer models, this part is easy to install, allowing you to restore your machine to its peak performance without hassle. Trust in this dependable sensor assembly to keep your laundry process smooth and effective. Whether you're a DIY enthusiast or a professional technician, this high-quality thermistor will meet your needs and exceed expectations. Keep your appliance running efficiently with the right replacement part.
Weight : 0.16 lbs
Package Dimension : 3.78 x 2.72 x 2.17
Please Verify Your Purchase to Submit a Review
The following parts are replaced by this product
- 6501KW2001A
Step 1: Unplug your refrigerator from the wall and move it away from the wall.
Step 2: Make sure the refrigerator is turned off and that all settings are off.
Step 3: Use a Phillips-head screwdriver to remove the screws that hold the back panel in place.
Step 4: Remove the back panel and carefully set it aside.
Step 5: Locate the 6501KW2001B LG sensor assembly.
Step 6: Use needle-nose pliers to unscrew the screws that secure the sensor assembly in place.
Step 7: Carefully pull the old sensor assembly out of its place and discard it.
Step 8: Take the new sensor assembly and place it in the correct position.
Step 9: Secure it by using the same screws you removed in Step 6.
Step 10: Reconnect the refrigerator to the power source.
Step 11: Put the back panel back in place and secure it with the screws.
Step 12: Turn on the refrigerator and reset any settings.
Step 13: Test the new sensor assembly to make sure it is working correctly.
Please keep in mind, these instructions are for general guidance and should always be used in conjunction with the manufacturer's manual, if available.


