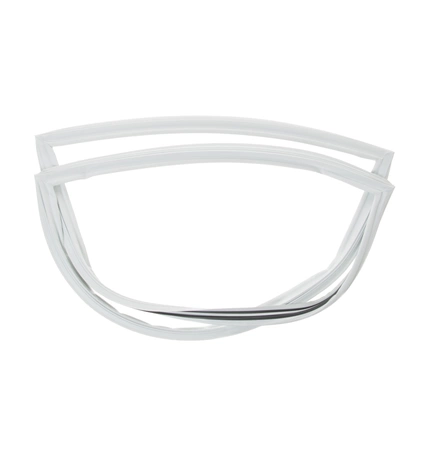
WR24X10231 GE Refrigerator Fresh Food Door Gasket Seal

Ensure your refrigerator maintains optimal freshness with this high-quality door gasket seal. Designed specifically for select GE models, as well as Hotpoint, Haier, Monogram, and Café brands, this essential component helps prevent air leaks, enhancing energy efficiency and maintaining consistent temperature levels. Crafted for durability, the gasket ensures a snug fit, safeguarding your perishables while reducing energy costs. Whether you’re replacing a worn-out seal or upgrading your refrigerator, this part is crucial for proficient performance. Easy to install, it offers a quick solution to improving your appliance's functionality. Invest in reliable kitchen maintenance and experience the difference with this superior gasket seal, ensuring your groceries stay fresh longer.
Weight : 7.36 lbs
Package Dimension : 28.50 x 18.90 x 1.90
Product Details
Reviews
Replaces Parts
Installation Instructions
Compatible Models
Compatible Brands
Ensure your refrigerator maintains optimal freshness with this high-quality door gasket seal. Designed specifically for select GE models, as well as Hotpoint, Haier, Monogram, and Café brands, this essential component helps prevent air leaks, enhancing energy efficiency and maintaining consistent temperature levels. Crafted for durability, the gasket ensures a snug fit, safeguarding your perishables while reducing energy costs. Whether you’re replacing a worn-out seal or upgrading your refrigerator, this part is crucial for proficient performance. Easy to install, it offers a quick solution to improving your appliance's functionality. Invest in reliable kitchen maintenance and experience the difference with this superior gasket seal, ensuring your groceries stay fresh longer.
Weight : 7.36 lbs
Package Dimension : 28.50 x 18.90 x 1.90
Please Verify Your Purchase to Submit a Review
The following parts are replaced by this product
- WR24X485
- WR24X518
- WR24X10049
- WR24X0485
- WR24X0518
- WR24X10231
1. Prepare to replace the gasket: Unplug the refrigerator and ensure the power is off. Gather supplies, including a flathead screwdriver, a new WR24X10231 door seal gasket, gloves, rags, and mild detergent.
2. Remove the old gasket: Use the flathead screwdriver to pry off the old gasket from the door frame. Make sure you are careful not to damage the frame as you do this.
3. Clean the frame: Once the old gasket is removed, use a rag and mild detergent to clean the area where the new gasket will be installed. This ensures no dirt or debris could prevent the gasket from sticking properly.
4. Place the new gasket: Carefully place the new WR24X10231 door seal gasket into the frame. Make sure the gasket fits snugly and is evenly placed.
5. Secure the gasket: Use the flathead screwdriver to secure the gasket in place.
6. Test the seal: Plug the refrigerator back in, turn the power on, and test the seal by closing the door and seeing if it seals properly. If it doesn't, adjust the gasket and test again until it is airtight.
Please keep in mind, these instructions are for general guidance and should always be used in conjunction with the manufacturer's manual, if available.


