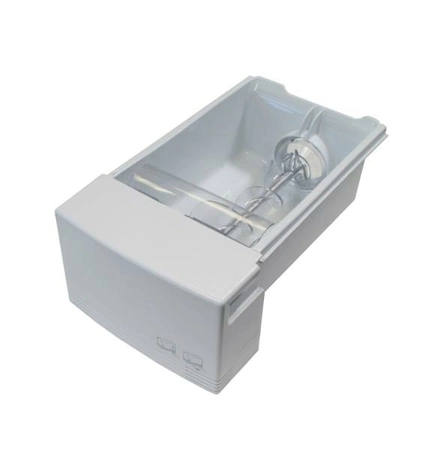
WR17X23191 GE Refrigerator Ice Bucket and Auger Assembly

Maintain the performance of your refrigerator with this essential ice maker assembly. Designed for compatibility with a range of brands including GE, Hotpoint, Haier, Monogram, and Café, this piece ensures reliable ice production for your home. The assembly features a durable ice bucket and auger mechanism, providing a seamless solution for maintaining your appliance’s efficiency. Regular maintenance or replacement of your ice maker is crucial for optimal performance and convenience. Whether you're hosting gatherings or simply enjoying chilled beverages, this part helps keep your ice supply abundant. Easy to install, it allows for a quick fix to common ice dispensing issues, ensuring your refrigerator continues to meet your family's needs. Ensure your cooling appliance remains in top shape with this quality replacement.
Weight : 18.76 lbs
Package Dimension : 19.09 x 12.52 x 10.91
Product Details
Reviews 2
Replaces Parts
Installation Instructions
Compatible Models
Compatible Brands
Maintain the performance of your refrigerator with this essential ice maker assembly. Designed for compatibility with a range of brands including GE, Hotpoint, Haier, Monogram, and Café, this piece ensures reliable ice production for your home. The assembly features a durable ice bucket and auger mechanism, providing a seamless solution for maintaining your appliance’s efficiency. Regular maintenance or replacement of your ice maker is crucial for optimal performance and convenience. Whether you're hosting gatherings or simply enjoying chilled beverages, this part helps keep your ice supply abundant. Easy to install, it allows for a quick fix to common ice dispensing issues, ensuring your refrigerator continues to meet your family's needs. Ensure your cooling appliance remains in top shape with this quality replacement.
Weight : 18.76 lbs
Package Dimension : 19.09 x 12.52 x 10.91
Please Verify Your Purchase to Submit a Review
The following parts are replaced by this product
- WR17X10768
- WR17X11429
- WR17X11307
Replacing the WR17X23191 GE Ice Bucket and Auger Assembly
1. Unplug the refrigerator from the wall and move it away from the wall to gain access to the back of the freezer compartment.
2. Remove the screws securing the rear freezer panel and remove the panel to access the ice maker.
3. Disconnect the electrical wiring from the rear of the ice maker.
4. Unscrew the mounting screws located on the sides of the ice maker.
5. Lift the ice maker carefully out of the freezer and place it onto a stable work surface.
6. Remove the screws that hold the ice bucket in place.
7. Pull out the old ice bucket and auger assembly.
8. Line up the new ice bucket and auger assembly with the slots in the ice maker housing.
9. Secure the new ice bucket and auger assembly with the screws removed from the old one.
10. Reattach the wiring and screws to secure the ice maker back into place.
11. Replace the rear freezer panel and secure it with the screws.
12. Slide the refrigerator back into place and plug it into the wall.
13. Turn on the refrigerator and test the ice maker to ensure proper operation.
Please keep in mind, these instructions are for general guidance and should always be used in conjunction with the manufacturer's manual, if available.


Login and Registration Form