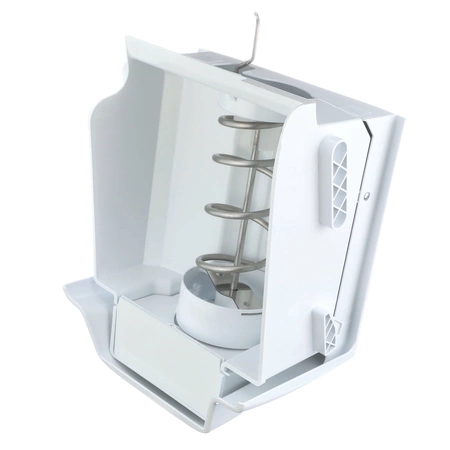
WR17X12079 GE Ice Bucket Assembly

Maintain your refrigerator's ice-making capability with this high-quality ice bucket assembly from GE. Designed to seamlessly integrate with GE, Hotpoint, Haier, Monogram, and Café appliances, this essential component ensures your ice maker operates efficiently and effectively. Crafted for durability and reliable performance, this ice bucket assembly accommodates your day-to-day needs for ice at home.
Whether you're hosting a summer gathering or simply enjoying chilled beverages, this part is key to guaranteeing a steady supply of ice. Easy to install and engineered for compatibility with multiple refrigerator models, it’s an indispensable addition to your kitchen appliance maintenance kit. Maintain your appliance's functionality and keep your family and guests refreshed with this dependable ice bucket assembly.
Weight : 24.96 lbs
Package Dimension : 24.80 x 14.21 x 9.84
Product Details
Reviews
Replaces Parts
Installation Instructions
Compatible Models
Compatible Brands
Maintain your refrigerator's ice-making capability with this high-quality ice bucket assembly from GE. Designed to seamlessly integrate with GE, Hotpoint, Haier, Monogram, and Café appliances, this essential component ensures your ice maker operates efficiently and effectively. Crafted for durability and reliable performance, this ice bucket assembly accommodates your day-to-day needs for ice at home.
Whether you're hosting a summer gathering or simply enjoying chilled beverages, this part is key to guaranteeing a steady supply of ice. Easy to install and engineered for compatibility with multiple refrigerator models, it’s an indispensable addition to your kitchen appliance maintenance kit. Maintain your appliance's functionality and keep your family and guests refreshed with this dependable ice bucket assembly.
Weight : 24.96 lbs
Package Dimension : 24.80 x 14.21 x 9.84
Please Verify Your Purchase to Submit a Review
The following parts are replaced by this product
- WR17X11483
Step 1: Unplug the refrigerator and turn off the water supply.
Step 2: Remove all food items from the freezer and refrigerator compartments. Remove any shelving, drawers and ice trays.
Step 3: Use a flathead screwdriver to remove the cover screws from the interior of the freezer compartment.
Step 4: Pull the freezer liner away from the walls. Be sure to pull it away from the top and bottom edges as well.
Step 5: Unscrew the screws that hold the bucket and auger assembly in place. Slide the assembly out of its mounting bracket.
Step 6: Place the new bucket and auger assembly into the mounting bracket and secure with the screws.
Step 7: Replace the freezer liner and secure with the cover screws.
Step 8: Reconnect the refrigerator to the power supply, and turn on the water supply.
Step 9: Replace all food items, shelves, drawers and ice trays.
Once you’ve completed these steps, the WR17X12079 Bucket and Auger Assembly should be replaced in your refrigerator.
Please keep in mind, these instructions are for general guidance and should always be used in conjunction with the manufacturer's manual, if available.


Login and Registration Form