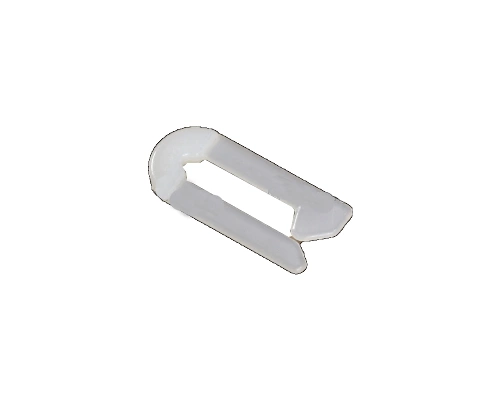
WH1X2117 GE Timer Knob Spring Clip

WH1X2117 is an original equipment manufactured (OEM) part. Enhance the functionality of your dryer with this reliable fastener, designed specifically for compatibility with GE, Hotpoint, Haier, Monogram, and Café appliances. Crafted with precision, this durable clip ensures a secure fit for your GE dryer timer knob, facilitating easy adjustments and enhancing your overall user experience. The sturdy construction promises longevity, making it a practical choice for maintenance or repairs. Whether you are replacing a worn-out component or simply upgrading your appliance, this spring clip is essential for restoring optimal performance. Quick to install, it allows you to get back to your laundry tasks efficiently. Invest in this quality part for seamless operation and enhanced reliability in your appliance.
Weight : 0.00 lbs
Package Dimension : 0.71 x 0.51 x 0.31
Product Details
Reviews
Replaces Parts
Installation Instructions
Compatible Models
Compatible Brands
WH1X2117 is an original equipment manufactured (OEM) part. Enhance the functionality of your dryer with this reliable fastener, designed specifically for compatibility with GE, Hotpoint, Haier, Monogram, and Café appliances. Crafted with precision, this durable clip ensures a secure fit for your GE dryer timer knob, facilitating easy adjustments and enhancing your overall user experience. The sturdy construction promises longevity, making it a practical choice for maintenance or repairs. Whether you are replacing a worn-out component or simply upgrading your appliance, this spring clip is essential for restoring optimal performance. Quick to install, it allows you to get back to your laundry tasks efficiently. Invest in this quality part for seamless operation and enhanced reliability in your appliance.
Weight : 0.00 lbs
Package Dimension : 0.71 x 0.51 x 0.31
Please Verify Your Purchase to Submit a Review
The following parts are replaced by this product
- WH1X1499
- WH1X1610
- WH2X561
- WH01X1499
- WH02X0561
- WH01X1610
- WH01X2117
Replacing the WH1X2117 GE Timer Knob Spring Clip
1. Prepare your work area: Gather the necessary tools, including a flathead screwdriver, pliers, and the new timer knob spring clip.
2. Remove the timer knob: To remove the timer knob, use the flathead screwdriver to pry it away from the control panel.
3. Disconnect the spring clip: Use the pliers to pull the spring clip away from the timer knob carefully.
4. Install the new spring clip: Line up the new spring clip with the timer knob and press it in place until it securely connects to the knob.
5. Reattach the timer knob: Place the timer knob back onto the control panel and push it firmly into place.
6. Test the timer knob: Make sure that the timer knob is securely in place and that it works properly by turning the knob and ensuring that the timer functions correctly.
These steps will help you successfully replace the WH1X2117 GE Timer Knob Spring Clip in no time!
Please keep in mind, these instructions are for general guidance and should always be used in conjunction with the manufacturer's manual, if available.


