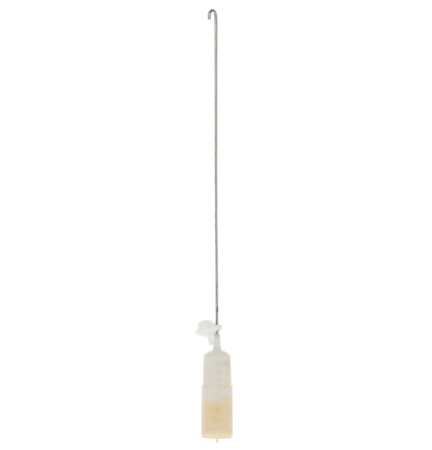
WH16X27179 GE Washer Suspension Rod

Maintain the performance and stability of your washing machine with this high-quality suspension rod. Specifically designed for various GE models, this essential part also suits Hotpoint, Haier, Monogram, and Café appliances. This durable component plays a crucial role in shock absorption, ensuring your washer operates smoothly and reduces excessive vibrations during the spin cycle. Crafted to meet rigorous standards, it guarantees easy installation, allowing you to enjoy a hassle-free repair experience. Whether you’re facing noisy cycles or erratic movements, replacing your worn-out suspension rod can restore your washer’s efficiency. Keep your laundry routine on track with this reliable part that supports the longevity of your appliance.
Weight : 1.96 lbs
Package Dimension : 23.39 x 6.73 x 1.73
Please Verify Your Purchase to Submit a Review
Step 1: Prepare to Replace the GE WH16X27179 Rod Assembly 27
Before you begin the process of replacing the GE WH16X27179 Rod Assembly 27, make sure you have all the necessary tools and materials. Gather a pair of work gloves, a flat-head screwdriver, needle-nose pliers, a small bowl, and the new rod assembly before you begin.
Step 2: Disconnect Power and Water Supplies
Your safety is the top priority, so make sure to unplug the washer from the power source and turn off the water supply before beginning any repairs.
Step 3: Remove the Old Rod Assembly
First, access the rod by removing the top panel. Use the flat-head screwdriver to loosen the screws, then lift the panel off. Next, use needle-nose pliers to carefully remove the nut that holds the old rod in place. Be sure to collect all the washers that may come off, and place them in the bowl for safe keeping.
Step 4: Install the New Rod Assembly
Now is the time to install the new rod assembly. Take the head of the rod and insert it into the opening where the old one was, making sure the groves line up. Then, secure it in place with the nut and washers you removed in the previous step.
Step 5: Fasten the Top Panel
When you are finished, secure the top panel back into place by tightening all the screws again. Once complete, reconnect the power and water supplies, and your repair should be good to go!
Please keep in mind, these instructions are for general guidance and should always be used in conjunction with the manufacturer's manual, if available.


