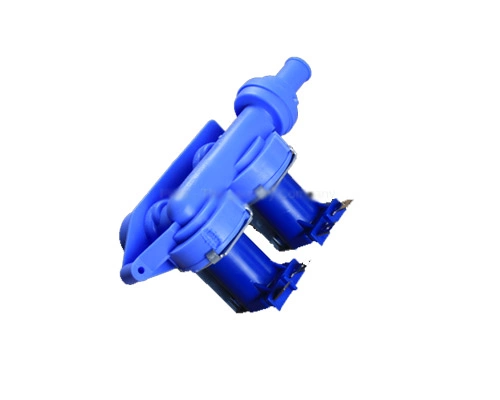
WH13X10023 GE Washer Water Inlet Fill Valve

WH13X10023 is an original equipment manufactured (OEM) part. Ensure optimal performance of your washing machine with the WH13X10023 water inlet fill valve. Designed specifically for GE appliances, this high-quality valve guarantees reliable water flow, preventing leaks and ensuring your laundry is completed efficiently. It is compatible with leading brands such as Hotpoint, Haier, Monogram, and Café, making it a versatile replacement option suitable for various models. Constructed with durability in mind, this valve offers excellent longevity, providing peace of mind and maintaining the functionality of your washing machine. Whether you're dealing with a malfunction or simply performing routine maintenance, choosing the right part is essential for smooth operations. Maintain your appliance with this essential component today!
Weight : 0.32 lbs
Package Dimension : 5.04 x 2.95 x 2.95
Please Verify Your Purchase to Submit a Review
Step 1: Unplug the Washer
Before beginning any repair work, unplug the washer from its power source. Shut off the water supply to the washer and make sure the water inlet hoses are disconnected from the back of the machine.
Step 2: Remove the Top Panel
With the washer unplugged and the water supply turned off, use a screwdriver to remove the screws securing the top panel to the washing machine. Gently lift the panel up and away from the machine.
Step 3: Locate the Water Inlet Fill Valve
The water inlet fill valve is connected to the back of the washer. It consists of a plastic or metal housing with two inlet ports and one outlet port. The inlet ports accept the hot and cold water hoses from the wall.
Step 4: Disconnect the Inlet Hoses
Remove the inlet hoses from the back of the washer by twisting the couplings counterclockwise. Use pliers to loosen the fittings if necessary. Make sure to have a bucket ready to catch any water that may come out.
Step 5: Unscrew the Water Inlet Fill Valve
Once the inlet hoses have been disconnected, unscrew the mounting screws securing the water inlet fill valve to the back of the washer. Pull the valve straight out and set it aside.
Step 6: Install the New Water Inlet Fill Valve
Take the new water inlet fill valve and align it into position on the back of the washer. Secure the valve with the mounting screws. Reattach the inlet hoses to the valve, making sure to tighten the couplings securely.
Step 7: Test the Connection
Plug the washer back in and turn on the water supply. Slowly turn each water knob to ensure the connection is secure and that there are no leaks.
Step 8: Replace the Top Panel
Replace the top panel on the washer, making sure to secure it with the screws.
Please keep in mind, these instructions are for general guidance and should always be used in conjunction with the manufacturer's manual, if available.


