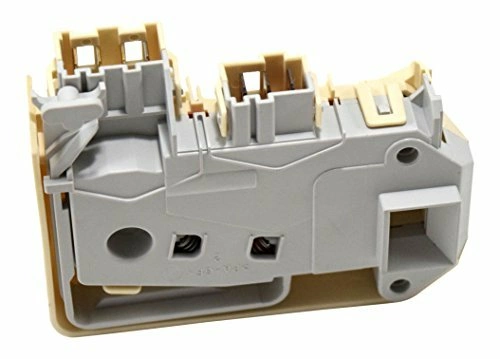
WH10X10008 GE Washer Door Lock and Switch Assembly

Ensure your washing machine operates safely and efficiently with this reliable door lock and switch assembly. This essential component, designed for a variety of compatible brands including GE, Hotpoint, Haier, Monogram, and Café, guarantees secure door closure during operation, preventing interruptions or leaks. Made with quality materials, it not only fits seamlessly into your appliance but also ensures long-lasting performance. Whether you're replacing a worn-out part or conducting routine maintenance, this door lock and switch assembly is the perfect solution for your washing machine needs. Simplify your repairs and restore your appliance's functionality with this dependable part tailored for your washer model.
Weight : 0.29 lbs
Package Dimension : 4.10 x 3.50 x 2.80
Please Verify Your Purchase to Submit a Review
Replacing the WH10X10008 GE Washer Door Lock and Switch Assembly
1. Unplug the washer power cord from the wall outlet and shut off the water supply to the washer.
2. Remove the screws located around the perimeter of the top of the washer control panel using a Phillips screwdriver. Put the screws in a safe place so you won’t forget where they go.
3. Pull the top panel upward, away from the washer body, to reveal the wiring connections for the door lock, switch assembly, and other components associated with the top panel.
4. Locate the wiring connectors for the WH10X10008 GE Washer Door Lock and Switch Assembly and disconnect them from the wiring harnesses.
5. Remove the nuts securing the assembly to the washer frame and slide the assembly out from the frame.
6. Insert the new WH10X10008 GE Washer Door Lock and Switch Assembly into the frame and secure it with the nuts.
7. Plug the new assembly’s wiring connectors into the appropriate wiring harnesses.
8. Install the top panel and secure it to the washer body with the previously removed screws.
9. Restore water supply and plug the power cord into the wall outlet.
10. Test the operation of the assembly by placing a load of laundry into the washer and ensuring that the door locks properly when the cycle is running.
Please keep in mind, these instructions are for general guidance and should always be used in conjunction with the manufacturer's manual, if available.


