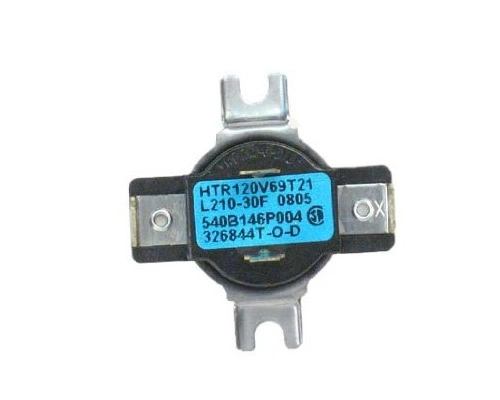
WE4M181 GE Cycling Thermostat

The GE WE4M181 T-STAT is the custom designed to make your GE dryer run safely and efficiently. We're your #1 source for genuine OEM appliance parts. Contact us for further questions as well as any other appliance parts needs!
Weight : 0.39 lbs
Package Dimension : 6.00 x 6.00 x 1.50
Product Details
Reviews
Replaces Parts
Installation Instructions
Compatible Models
Compatible Brands
The GE WE4M181 T-STAT is the custom designed to make your GE dryer run safely and efficiently. We're your #1 source for genuine OEM appliance parts. Contact us for further questions as well as any other appliance parts needs!
Weight : 0.39 lbs
Package Dimension : 6.00 x 6.00 x 1.50
Please Verify Your Purchase to Submit a Review
The following parts are replaced by this product
- WE04M0181
DIY Guide for Replacing a GE WE4M181 T-Stat
Replacing a GE WE4M181 t-stat can be a relatively simple, cost-effective DIY project – all you need is a few basic tools, and a bit of patience. With this quick guide, you can replace an old t-stat with a new one quickly and easily:
1. Locate Your T-Stat - Before you start your project, it's important to know where the t-stat is located. Typically, you'll find it mounted on an interior wall, near the furnace and air conditioner. If you can't locate it, consult the owner's manual for your unit.
2. Turn off the Power - To ensure safety during the job, turn off the power to the unit before beginning. This can usually be done at the breaker box.
3. Remove the Old T-Stat - Once the power is off, you can begin removing the old t-stat. Start by opening the front panel of the unit to get access to the t-stat mounting screws. Then, unscrew the t-stat from the wall and remove it from the unit.
4. Install the New T-Stat - Now that the old t-stat is removed, you can start installing the new one. Begin by connecting the wiring to the new t-stat. Make sure the wires are connected according to the instructions on the new t-stat. Then, mount the t-stat to the wall and secure it in place with the mounting screws.
5. Test the Installation - To make sure the installation was a success, test it by turning the power back on and setting the t-stat to the desired temperature. If everything is working correctly, the unit should kick on and off according to your desired settings.
These steps should help you easily replace an old GE WE4M181 t-stat with a new one. With a few basic tools and a bit of patience, you can save yourself time and money by taking on this DIY project.
Please keep in mind, these instructions are for general guidance and should always be used in conjunction with the manufacturer's manual, if available.


