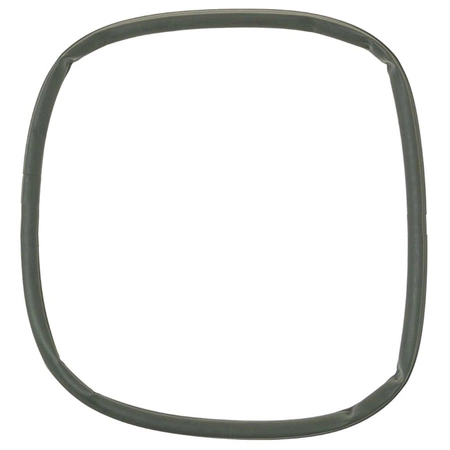
WE10X26840 GE Door Sealing Assembly

Ensure optimal performance and prevent leaks with this high-quality door sealing assembly from GE. Designed to fit a range of appliances, including models from GE, Hotpoint, Haier, Monogram, and Café, this gasket and seal is an essential component for your dryer. It effectively reduces moisture escape and enhances energy efficiency, safeguarding your laundry from potential damage. Crafted to meet stringent quality standards, this replacement part guarantees durability and reliability for your home. Easy to install, it revitalizes your appliance's sealing capability, ensuring a tight closure during operation. Elevate your dryer’s performance with this essential part, ensuring your laundry routine remains efficient and hassle-free.
Weight : 0.73 lbs
Package Dimension : 8.00 x 7.00 x 1.80
Please Verify Your Purchase to Submit a Review
Step 1: Prepare for the Replacement
Before you begin your project, put on a pair of work gloves to protect your hands and gather the supplies necessary to replace your GE WE10X26840 Door Sealing Gasket. You'll need:
• A #2 Phillips head screwdriver
• The new GE WE10X26840 Door Sealing Gasket
Step 2: Open the Washer
Start by unplugging the washer from the wall outlet and turning the power supply off if necessary. Carefully pull the washer away from the wall and open the lid.
Step 3: Remove the Old Gasket
Remove the screws from around the washer's lip with the #2 Phillips head screwdriver and lift the top panel up. This will allow you to access the old gasket. Disconnect any electrical wiring connected to the gasket, which is located on the back of the washer.
Once the wiring is disconnected, carefully remove the old gasket. Make sure to save the screws in case you need them later.
Step 4: Install the New Gasket
Position the new gasket around the edge of the washer and press it into place. Reconnect the electrical wiring and secure the gasket with the screws you saved from earlier.
Step 5: Test the Washer
Replace the lid and plug the washer back into the wall outlet. Turn the power back on, if necessary, and run a test cycle to make sure the new gasket has been installed properly.
Step 6: Clean Up
Once you have verified that the new gasket is working properly, clean up the work area. Put away your tools and any leftover parts, and give the washer a quick wipe down to ensure a long life for the new gasket.
Please keep in mind, these instructions are for general guidance and should always be used in conjunction with the manufacturer's manual, if available.


