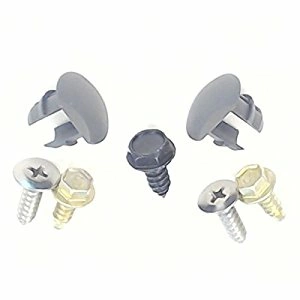
WD35X10383 GE Dishwasher Installation Screws

Ensure your dishwasher runs smoothly with the WD35X10383 installation screws from GE. Designed for durability and reliability, these fasteners are essential for secure installation in various GE appliance models, including Hotpoint, Haier, Monogram, and Café. Made specifically for dishwashers, these screws guarantee a perfect fit and easy assembly, keeping your appliance securely in place during operation. Whether you're replacing old screws or conducting a new installation, trust this high-quality part to maintain optimal performance in your kitchen. Simplify your repairs and installations with the right components that Maintain the longevity and functionality of your dishwasher. Order your installation screws today and enjoy hassle-free maintenance!
Weight : 0.355300 lbs
Dimension : 5.551100 x 5.511800 x 1.614100
Write Your Own Review
1. Start by gathering the necessary tools for the job, such as a screwdriver, WD35X10383 GE screws, and any other necessary parts or materials.
2. Unscrew the existing screws and remove them from the area where you will install the new ones.
3. Clean the area where the screws are to be placed, making sure to remove any dust, dirt, or debris.
4. Carefully place the new screws into the holes in the designated area, ensuring that they are properly lined up and securely in place.
5. Securely tighten the screws using the screwdriver, being careful not to over-tighten them.
6. Check the stability of the screws to ensure that they are securely in place.
7. Reassemble any additional components, if necessary, after installation.
8. Test the screws to ensure that they provide the proper support for the components attached to them.
Please keep in mind, these instructions are for general guidance and should always be used in conjunction with the manufacturer's manual, if available.


