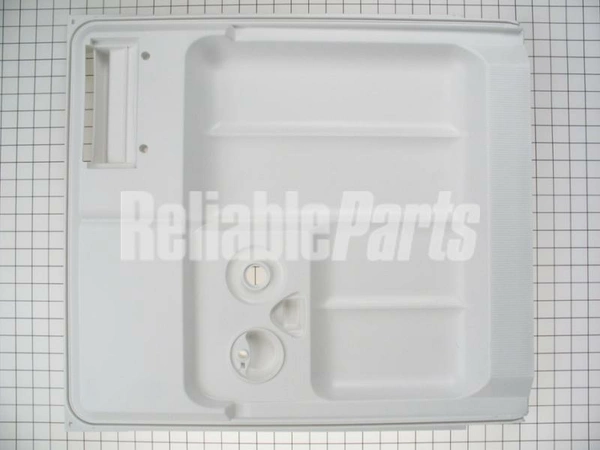
WD31X10004 GE Door Inner Panel

Elevate your dishwasher's performance with this high-quality inner door panel designed for select GE, Hotpoint, Haier, Monogram, and Café appliances. Crafted to meet stringent manufacturing standards, this durable component not only enhances the aesthetic appeal of your dishwasher but also ensures optimal functionality and longevity. The inner door panel serves as a critical barrier, protecting internal mechanisms while providing easy access for repairs or maintenance. With a perfect fit for various models, installation is straightforward, making it an ideal solution for DIY enthusiasts and professional technicians alike. Trust this reliable replacement part to restore your appliance's efficiency and maintain your kitchen's integrity. Enjoy peace of mind knowing that you're investing in a product built for long-lasting performance.
Weight : 16.90 lbs
Package Dimension : 27.50 x 26.70 x 3.20
Product Details
Reviews
Replaces Parts
Installation Instructions
Compatible Models
Compatible Brands
Elevate your dishwasher's performance with this high-quality inner door panel designed for select GE, Hotpoint, Haier, Monogram, and Café appliances. Crafted to meet stringent manufacturing standards, this durable component not only enhances the aesthetic appeal of your dishwasher but also ensures optimal functionality and longevity. The inner door panel serves as a critical barrier, protecting internal mechanisms while providing easy access for repairs or maintenance. With a perfect fit for various models, installation is straightforward, making it an ideal solution for DIY enthusiasts and professional technicians alike. Trust this reliable replacement part to restore your appliance's efficiency and maintain your kitchen's integrity. Enjoy peace of mind knowing that you're investing in a product built for long-lasting performance.
Weight : 16.90 lbs
Package Dimension : 27.50 x 26.70 x 3.20
Please Verify Your Purchase to Submit a Review
The following parts are replaced by this product
- WD31M65
- WD31M0065
- WD31M0058
- WD31M0063
Replacing the Samsung DE81-03590A SVC-ASSY DOOR FULL SST
If your Samsung DE81-03590A SVC-ASSY DOOR FULL SST is damaged, replacing it will ensure the proper functioning of your appliance. Below are a few easy steps to help you replace your Samsung DE81-03590A SVC-ASSY DOOR FULL SST.
1.Begin by unplugging the appliance and turning off the power to your home.
2.Use a Phillips head screwdriver to remove the screws locating the old SVC-ASSY door. Once all screws are removed, gently pull the door away from the appliance.
3.Clean the groove of any dirt or debris before placing the new SVC-ASSY door in its place.
4.Carefully line up the holes on the new door with those on the fridge and use the same Phillips head screwdriver to secure the door with screws.
5.Plug the appliance back in and turn the power back on.
6.Check the door for proper sealing by closing it and ensuring that no cold air escapes.
Following these simple steps will ensure that your new SVC-ASSY door is correctly installed. With your new door in place, your appliance should be working as good as new!
Please keep in mind, these instructions are for general guidance and should always be used in conjunction with the manufacturer's manual, if available.


