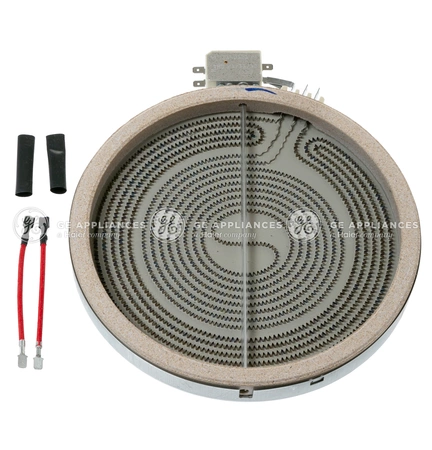
WB30X43559 GE Surface Element Radiant

The GE WB30X43559 Dual Heating Element Kit is the perfect solution for your appliance. Whether you're a professional or a DIYer, the GE WB30X43559 Dual Heating Element Kit is the perfect choice for your heating needs. We're your #1 source for genuine OEM appliance parts. Contact us for further questions as well as any other appliance parts needs!
Product Details
Reviews
Replaces Parts
Installation Instructions
Compatible Models
Compatible Brands
The GE WB30X43559 Dual Heating Element Kit is the perfect solution for your appliance. Whether you're a professional or a DIYer, the GE WB30X43559 Dual Heating Element Kit is the perfect choice for your heating needs. We're your #1 source for genuine OEM appliance parts. Contact us for further questions as well as any other appliance parts needs!
Please Verify Your Purchase to Submit a Review
Please note: We use this information only to confirm your purchase, it won’t be published.
The following parts are replaced by this product
- WB30T10095
1. Before beginning, turn off the power to your oven at the circuit breaker box. If you are uncertain that this has been done, check it to be sure.
2. Unplug the stove and pull it out a few inches so you can access the back panel. Unscrew the two screws that hold the panel in place.
3. Locate the heating elements and disconnect them from the control panel by removing the two screws that secure each element to the panel.
4. Inspect the new GE WB30X43559 Dual Heating Element Kit and make sure all the components needed for the installation are present and in good condition.
5. Connect the new elements to the control panel using the same screws you removed earlier. Take care not to overtighten the screws.
6. Plug the stove back into the wall outlet and push it back into place.
7. Turn the power back on at the circuit breaker and test the new elements by turning the oven on and setting the temperature. Check to make sure the heat is evenly distributed on both sides of the oven.
8. Once the new elements are working properly, screw the back panel securely into place and you’re all set.
Please keep in mind, these instructions are for general guidance and should always be used in conjunction with the manufacturer's manual, if available.


