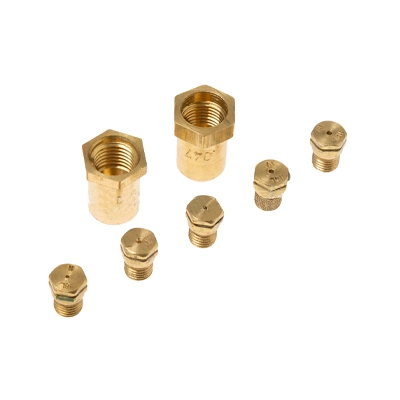
WB28X39149 GE Conversion Kit

Maintain your cooking experience with this high-quality gas burner and control valve conversion kit, designed to Maintain the performance of your GE, Hotpoint, Haier, Monogram, or Café range. Crafted using durable materials, this conversion kit ensures reliable function and longevity, making it a vital component for optimal stove operation. Offering seamless compatibility, it simplifies your cooking transitions while providing precise heat control for your meals. Ideal for home chefs looking to improve their kitchen efficiency, this kit is easy to install, allowing you to enjoy your favorite recipes with confidence. Choose this essential part for a smoother, more consistent cooking experience. Invest in quality and make meal preparation a breeze.
Product Details
Reviews
Replaces Parts
Installation Instructions
Compatible Models
Compatible Brands
Maintain your cooking experience with this high-quality gas burner and control valve conversion kit, designed to Maintain the performance of your GE, Hotpoint, Haier, Monogram, or Café range. Crafted using durable materials, this conversion kit ensures reliable function and longevity, making it a vital component for optimal stove operation. Offering seamless compatibility, it simplifies your cooking transitions while providing precise heat control for your meals. Ideal for home chefs looking to improve their kitchen efficiency, this kit is easy to install, allowing you to enjoy your favorite recipes with confidence. Choose this essential part for a smoother, more consistent cooking experience. Invest in quality and make meal preparation a breeze.
Please Verify Your Purchase to Submit a Review
The following parts are replaced by this product
- WB28X28136
Step 1: Shut off the power to the stove. Doing this is important for the safety of the person doing the replacing. Unplug the unit from the wall socket or trip the circuit breaker in the main fuse box.
Step 2: Remove the cook top. Depending on your model, you may need to use a flat head screwdriver to pry up the cook top before loosening the mounting screws. Lift the cooktop up and set it aside.
Step 3: Remove the burner grates by lifting them up and off the LP Conversion Kit. If needed, you can use a damp cloth to wipe away any debris from the surface.
Step 4: Disconnect the wiring from the LP Conversion Kit. Locate the wires connected to the kit, and gently pull them away from the connections. Typically, there are two wires that need to be disconnected: one black wire and one white wire.
Step 5: Remove the screws that secure the LP Conversion Kit to the stove. Carefully remove the screws using a Phillips head screwdriver, and set them aside.
Step 6: Remove the LP Conversion Kit by gently pulling it away from the stove. Set the kit aside so you can reuse it later or dispose of it properly.
Step 7: Install the new LP Conversion Kit. Place the new kit into position, making sure it lines up with the mounting holes. Secure the kit in place by re-installing the screws.
Step 8: Reconnect the wiring to the LP Conversion Kit. Push the connectors firmly into the ports, until they lock in place.
Step 9: Reinstall the burner grates. Place the grates onto the LP Conversion Kit, making sure they are fitted firmly and properly.
Step 10: Reinstall the cook top. Line up the cooktop with the LP Conversion Kit, and secure it in place using the mounting screws.
Step 11: Turn the power back on to the stove. Re-plug the unit in, or flip the switch in the main fuse box. Test the stove to make sure everything works correctly.
Please keep in mind, these instructions are for general guidance and should always be used in conjunction with the manufacturer's manual, if available.


