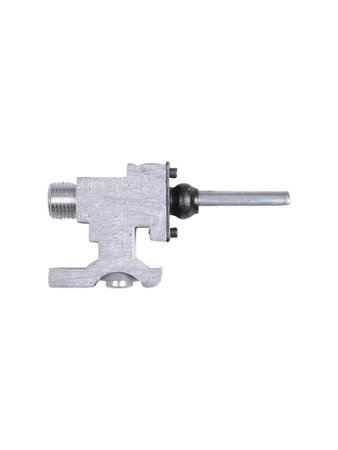
WB28K10578 GE Oven Surface Burner Valve

WB28K10578 is an original equipment manufactured (OEM) part. Maintain your cooking experience with this high-quality gas burner and control valve, designed specifically for various GE ovens and compatible brands including Hotpoint, Haier, Monogram, and Café. This essential part ensures optimal performance and safety while delivering precise flame control for perfect cooking results. Crafted by GE, a trusted name in home appliances, this component not only enhances the functionality of your oven but also contributes to energy efficiency. Installing this valve can help prevent gas leaks and maintain consistent heating, making it a vital component for your kitchen. Whether you're replacing an old part or performing routine maintenance, this gas burner valve is a reliable choice for any oven enthusiast. Don’t compromise on quality—choose a part designed to last.
Weight : 0.08 lbs
Package Dimension : 3.58 x 2.28 x 1.38
Please Verify Your Purchase to Submit a Review
Step 1 - Unplug the GE WB28K10578 Round Valve Burner.
Step 2 - Turn off both the gas knob and power switch located on the wall behind your stove.
Step 3 - Turn off the main gas valve to the stove as well as the electricity to your kitchen.
Step 4 - Begin disassembling the burner by unscrewing the screws that secure the burner to the stove top.
Step 5 - After carefully pulling up and out of the stove, lay it flat and begin to remove the various components that form the burner. Start with the burner cover, the igniter wire, and then the burners.
Step 6 - Once the burner is completely disassembled, use a cloth dampened in warm soapy water to gently clean the individual parts. Pay special attention to the burner cap and burner holes for any dirt or food particles.
Step 7 - Check for any corrosion or rust, and replace any parts as needed.
Step 8 - Place the new burner components into the burner frame, ensuring that each part is correctly placed and connected securely.
Step 9 - Place the frame back into the stovetop, carefully aligning it with the port for the burner.
Step 10 - Secure the frame using the screws.
Step 11 - Connect the igniter wire and burner cover.
Step 12 - Turn the power switch and main gas valve back on.
Step 13 - Restore the power to your kitchen.
Step 14 - Carefully light the burner and test the flame to ensure it is working properly.
Please keep in mind, these instructions are for general guidance and should always be used in conjunction with the manufacturer's manual, if available.


