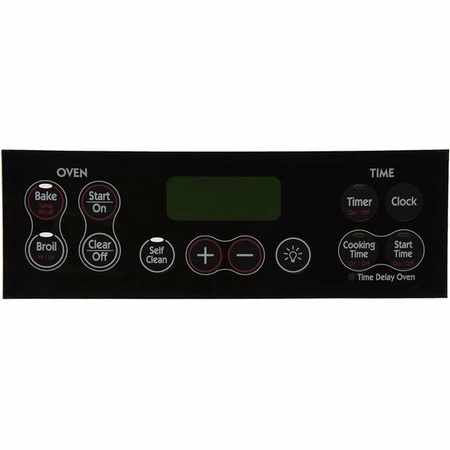
WB27K10118 GE Range Overlay

WB27K10118 is an original equipment manufactured (OEM) part. Enhance the functionality of your kitchen appliance with this essential replacement part. Designed specifically for select models from GE, Hotpoint, Haier, Monogram, and Café, this touchpad and keypad ensure seamless control over your oven settings. Crafted for durability, the overlay provides a reliable interface, facilitating precise temperature adjustments and cooking programs. Whether you’re baking a gourmet meal or simply reheating leftovers, this component is critical for optimal performance. Easy to install, it’s an ideal solution for restoring your oven to its full potential. Ensure your cooking experience remains uninterrupted with this high-quality control overlay, perfectly suited for various GE ovens. Maintain your appliance and bring consistency back to your culinary creations.
Weight : 0.57 lbs
Package Dimension : 11.54 x 7.32 x 0.94
Please Verify Your Purchase to Submit a Review
Step 1: Unplug the appliance and turn off the electricity.
Step 2: Remove the screws holding the top panel in place and then lift the panel up to access the back of the control.
Step 3: Remove the overlay by pressing firmly on the ends and gently pulling it away from the control.
Step 4: Inspect the new overlay to make sure it is the correct model (GE WB27K10118, T09-B HP, Black).
Step 5: Place the overlay onto the control, making sure the edges are lined up correctly.
Step 6: Secure the overlay by pressing firmly on the edges and checking that there is no gap between the overlay and the control.
Step 7: Replace the screws holding the top panel in place.
Step 8: Plug the appliance in and turn the electricity back on.
Please keep in mind, these instructions are for general guidance and should always be used in conjunction with the manufacturer's manual, if available.


Login and Registration Form