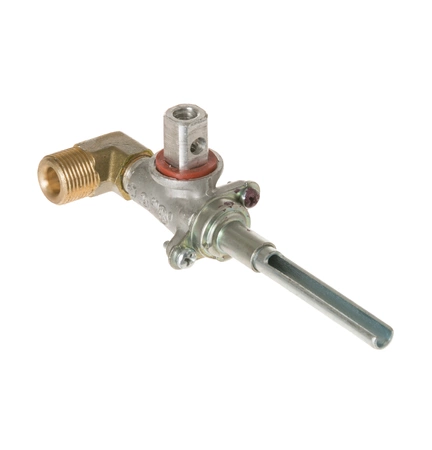
WB19T10085 GE Oven Surface Burner Valve

WB19T10085 is an original equipment manufactured (OEM) part. Maintain your cooking experience with this premium gas burner and control valve, designed specifically for use with GE, Hotpoint, Haier, Monogram, and Café ovens. Engineered for reliability, this component ensures precise gas flow, allowing for consistent heating and improved cooking performance. Whether you're replacing a faulty part or performing routine maintenance, this valve provides the perfect solution to restore your oven's efficiency. Crafted to meet high-quality standards, it guarantees compatibility and durability, making it an essential addition to your kitchen appliance repairs. Enhance your culinary creations with the confidence that comes from using a trusted brand's part, tailored to meet your oven's specifications.
Weight : 0.12 lbs
Package Dimension : 4.49 x 2.52 x 1.50
Please Verify Your Purchase to Submit a Review
DIY: How to Replace GE WB19T10085 Gas Valve
Replacing the gas valve on your GE stove can seem like a daunting task, but with the right tools and following these simple steps, you can easily update your gas valve.
Materials Needed:
-GE WB19T10085 Gas Valve
-Screwdriver
-Penetrating Oil
-Pliers
-Safety Goggles
Instructions:
1. Gather Your Materials: Make sure you have all the necessary materials before you start. Safety goggles are essential, as this project can involve potentially hazardous gas and debris flying around.
2. Shut Off Gas Supply: Before you do anything, make sure you turn off the main gas valve for your stove. This will prevent any leaks or fires from occurring during the project.
3. Remove Old Valve: Using a screwdriver, remove the screws that are securing the old gas valve in place. Once the screws are out, you can remove the old valve from the stove.
4. Clean the Area: Now that the old valve is out of the way, use a rag and some penetrating oil to clean the area where the new valve will go. Make sure you get any dust, dirt, and grease off the surface before continuing.
5. Install New Valve: Once the area is clean and dry, you can begin installing the new valve. Start by lining up the two halves of the valve and then slide it into place. You may need to use pliers to tighten the screws in order to secure the new valve in place.
6. Test the Valve: Once the new valve is installed, it’s time to test it out. Turn the main gas supply back on and test the new valve to make sure that it’s working correctly. If everything looks good, you’re done!
Conclusion:
Replacing the gas valve in your GE stove doesn’t have to be a difficult task. With the right instructions and the right tools, you can easily update your gas valve and keep your stove running smoothly.
Please keep in mind, these instructions are for general guidance and should always be used in conjunction with the manufacturer's manual, if available.


