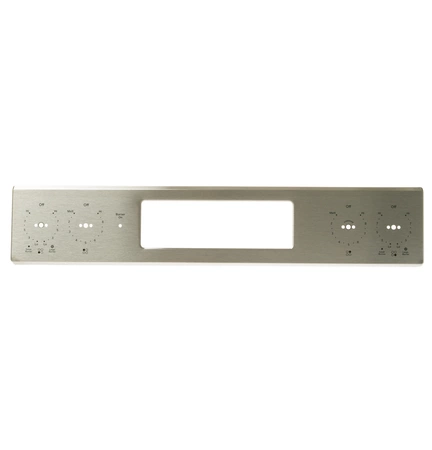
WB07X33620 GE Range Stainless Steel Control Panel

Maintain your oven with the high-quality stainless steel control panel designed specifically for select GE appliances. Crafted to Maintain both durability and aesthetics, this panel offers a perfect fit for various models, including those from GE, Hotpoint, Haier, Monogram, and Café. The sleek stainless steel finish not only provides a modern look but also easily withstands the rigors of everyday cooking.
Replacing a worn or damaged panel is essential for maintaining precise temperature control and overall functionality of your oven. This part is straightforward to install, making it an ideal choice for DIY enthusiasts and professionals alike. Ensure your cooking experience remains efficient and stylish with this essential oven component. Maintain today and enjoy the difference!
Product Details
Reviews
Replaces Parts
Installation Instructions
Compatible Models
Compatible Brands
Maintain your oven with the high-quality stainless steel control panel designed specifically for select GE appliances. Crafted to Maintain both durability and aesthetics, this panel offers a perfect fit for various models, including those from GE, Hotpoint, Haier, Monogram, and Café. The sleek stainless steel finish not only provides a modern look but also easily withstands the rigors of everyday cooking.
Replacing a worn or damaged panel is essential for maintaining precise temperature control and overall functionality of your oven. This part is straightforward to install, making it an ideal choice for DIY enthusiasts and professionals alike. Ensure your cooking experience remains efficient and stylish with this essential oven component. Maintain today and enjoy the difference!
Please Verify Your Purchase to Submit a Review
Please note: We use this information only to confirm your purchase, it won’t be published.
The following parts are replaced by this product
- WB07X30049
DIY Guide to Replacing the GE WB07X33620 Stainless Control Panel
Step 1: Prepare the Tools and Materials Needed - Be sure to have all the necessary tools and materials before starting the replacement. Required materials include an adjustable wrench, a screwdriver, and the required replacement part – the GE WB07X33620 Stainless Control Panel.
Step 2: Unplug the Appliance - As a safety precaution, always unplug the appliance from its power source before starting any repairs or replacements.
Step 3: Remove the Existing Control Panel - Using the adjustable wrench, carefully unscrew the mounting screws holding down the existing control panel. Once the screws are removed, carefully lift the panel away from the rest of the appliance.
Step 4: Install the New Control Panel - Align the new control panel with the existing mounting points and press it firmly into place. Secure the panel in place using the screws that were removed in step 3.
Step 5: Test the New Control Panel - Plug the appliance back into its power source and test the new control panel to ensure it is working correctly. If the panel is functioning properly, the repair is complete.
Please keep in mind, these instructions are for general guidance and should always be used in conjunction with the manufacturer's manual, if available.


