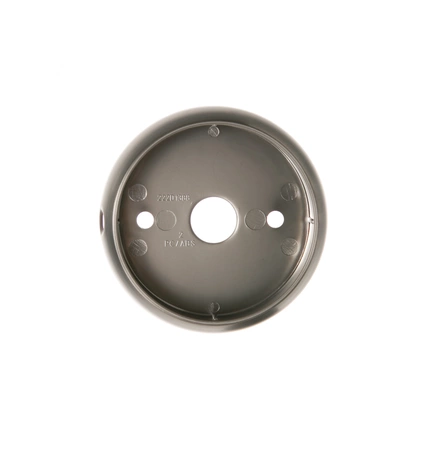
WB04K10037 GE Range Bezel Knob

Maintain the functionality and aesthetics of your oven with this precision-crafted bezel knob, designed to offer a perfect replacement for your worn or broken component. Made by a trusted brand, this part suits a range of GE appliances, including Hotpoint, Haier, Monogram, and Café. Its robust design ensures smooth operation, making it easy to control temperature settings for optimal cooking results. Installation is straightforward, allowing you to restore your oven's performance without professional help. Whether you're tuning into baking or broiling, this knob provides reliability and style. Update your kitchen appliance with this essential part and enjoy seamless cooking experiences.
Weight : 0.22 lbs
Package Dimension : 8.00 x 7.50 x 0.50
Product Details
Reviews
Replaces Parts
Installation Instructions
Compatible Models
Compatible Brands
Maintain the functionality and aesthetics of your oven with this precision-crafted bezel knob, designed to offer a perfect replacement for your worn or broken component. Made by a trusted brand, this part suits a range of GE appliances, including Hotpoint, Haier, Monogram, and Café. Its robust design ensures smooth operation, making it easy to control temperature settings for optimal cooking results. Installation is straightforward, allowing you to restore your oven's performance without professional help. Whether you're tuning into baking or broiling, this knob provides reliability and style. Update your kitchen appliance with this essential part and enjoy seamless cooking experiences.
Weight : 0.22 lbs
Package Dimension : 8.00 x 7.50 x 0.50
Please Verify Your Purchase to Submit a Review
The following parts are replaced by this product
- WB04K10025
DIY Guide: How to Replace the GE WB04K10037 SKIRT
1. First, shut off your range’s power supply. Disconnect the power cord from the wall outlet and shut off the circuit breaker.
2. Next, remove the two screws for the existing GE WB04K10037 skirt. Carefully remove the skirt from the range by gently pulling on the skirt from the bottom.
3. Tip: Before taking out the screws, take a picture of the assembly to help you remember how the pieces go back together.
4. Grab your new GE WB04K10037 skirt and familiarize yourself with the instructions that come with it. Take a few minutes to read through them and make sure you understand them.
5. Place the new GE WB04K10037 skirt onto the back of the range, ensuring it fits well. Make sure the mounting holes are lined up with the hole locations on the range.
6. Secure the skirt in place with the supplied mounting screws. Re-tighten all the screws to ensure a secure fit.
7. Test the new GE WB04K10037 skirt by turning on the power supply to your range. If everything works as it should, you’re done!
Congratulations, you have successfully replaced the GE WB04K10037 skirt!
Please keep in mind, these instructions are for general guidance and should always be used in conjunction with the manufacturer's manual, if available.


