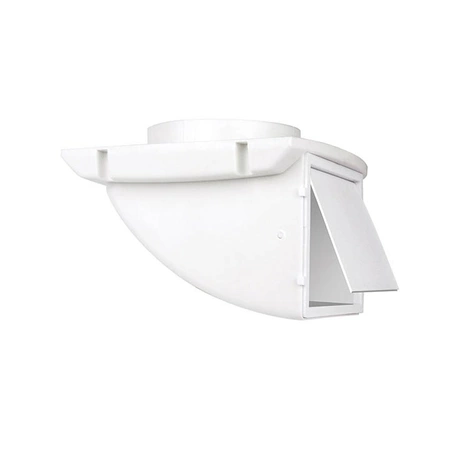
SDV4WXZW4 Dundas Jafine Dundas Soffit Dryer Vent Cap
Part #: DUN SDV4WXZW4
SDV4WXZW4 Dundas Soffit Dryer Vent Cap
SDV4WXZW4 Dundas Soffit Dryer Vent Cap
Please Verify Your Purchase to Submit a Review
Please note: We use this information only to confirm your purchase, it won’t be published.
DIY Guide to Replacing an SDV4WXZW4 Soffit Dryer Vent
Doing a soffit dryer vent replacement can help you keep your home safe from a fire hazard and improve its energy efficiency. Here is a DIY guide to replacing an SDV4WXZW4 soffit dryer vent.
Materials Needed:
-Tape measure
-Putty knife
-Cordless drill
-Screwdriver
-New soffit dryer vent
-Silicone caulk
-Caulk gun
-Utility knife
Step 1: Measure the Existing Vent Opening. Take measurements of the existing dryer vent opening in the soffit.
Step 2: Remove the Old Vent. Use the putty knife to remove any caulk or sealant around the outside of the existing vent, then unscrew and remove the screws holding it in place. Carefully pull out the old vent.
Step 3: Prepare the New Vent. Take the new vent and make sure it fits into the existing opening. Once you confirm that it does, apply a thin bead of silicone caulk around the outside edge of the flange on the new vent.
Step 4: Install the New Vent. Carefully press the new vent into the existing opening and use the screws from the old vent to secure it in place. Apply additional caulk along the outside edge of the flange if necessary.
Step 5: Test the New Vent. Turn on the dryer and make sure that the new vent is working properly. Check for any air leaks around the vent, and if there are any, apply additional caulk to seal it up.
Following these simple steps will help ensure that you have successfully replaced the SDV4WXZW4 soffit dryer vent and improved the safety and energy efficiency of your home.
Please keep in mind, these instructions are for general guidance and should always be used in conjunction with the manufacturer's manual, if available.
No more associated models for this part.


