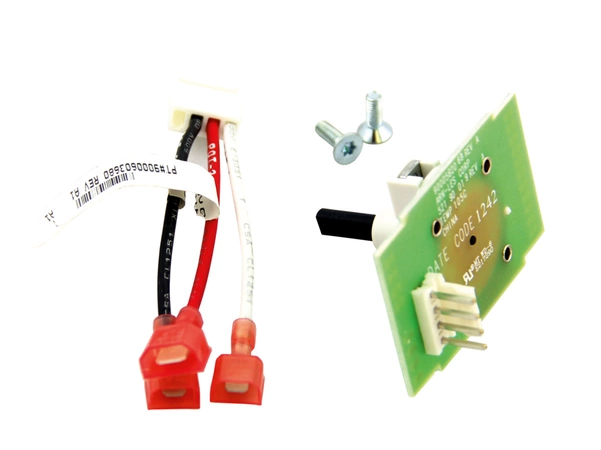
00624610 Bosch Range Potentiometer

Maintain your cooking experience with the Bosch oven potentiometer, a crucial component designed to optimize your oven's performance. This high-quality switch ensures precise temperature control, allowing you to achieve perfect cooking results every time. Crafted by Bosch, a trusted name in kitchen appliances, this potentiometer is compatible with multiple brands, including Thermador and Gaggenau, making it a versatile choice for various oven models.
Installation is straightforward, making it an ideal solution for DIY enthusiasts or anyone looking to restore their oven to its best functionality. Ensure your culinary adventures are not hindered by unreliable parts; replace your old switch with this reliable potentiometer and enjoy consistent cooking excellence. Whether you're baking, broiling, or roasting, this component is essential for maintaining your oven’s efficiency.
Weight : 1.68 lbs
Package Dimension : 10.63 x 7.17 x 3.07
Product Details
Reviews
Replaces Parts
Installation Instructions
Compatible Models
Compatible Brands
Maintain your cooking experience with the Bosch oven potentiometer, a crucial component designed to optimize your oven's performance. This high-quality switch ensures precise temperature control, allowing you to achieve perfect cooking results every time. Crafted by Bosch, a trusted name in kitchen appliances, this potentiometer is compatible with multiple brands, including Thermador and Gaggenau, making it a versatile choice for various oven models.
Installation is straightforward, making it an ideal solution for DIY enthusiasts or anyone looking to restore their oven to its best functionality. Ensure your culinary adventures are not hindered by unreliable parts; replace your old switch with this reliable potentiometer and enjoy consistent cooking excellence. Whether you're baking, broiling, or roasting, this component is essential for maintaining your oven’s efficiency.
Weight : 1.68 lbs
Package Dimension : 10.63 x 7.17 x 3.07
Please Verify Your Purchase to Submit a Review
The following parts are replaced by this product
- 418329
- 619079
- 624610
DIY Guide to Replacing the Bosch 00624610 Potentiometer+Adaptor Harness
Are you looking to replace the Bosch 00624610 Potentiometer+Adaptor Harness and need DIY instructions? Here’s a step-by-step guide on how to do it:
1. First, prepare your workspace. Make sure to gather all of the necessary tools to complete the job. These may include: a Phillips screwdriver, pliers, a flathead screwdriver, a socket set and/or wrench, and soldering iron. Additionally, make sure that you have protective eyewear and gloves for safety before beginning your project.
2. Next, locate and unplug the power source from the device. This can be found in the back of the device and should be clearly labeled. Once the power source is removed, open up the device’s casing to gain access to the internal components.
3. After gaining access, locate the Bosch 00624610 Potentiometer+Adaptor Harness. This can usually be found near the top of the device and usually looks like a black cylindrical piece that connects wires.
4. With the harness located, use the appropriate tools to carefully remove it. Depending on the type of device, you may need to use a combination of a Phillips screwdriver or pliers to remove the screws holding the harness in place. Once the harness is removed, you will need to disconnect the wires connecting it to the device. Be sure to disconnect each wire individually.
5. Now that the harness is disconnected, you can begin installing the new one. Connect the wires from the harness to the device exactly in the same order as the old one. Once connected, secure the harness back into the device by reinstalling the screws.
6. Once the harness is secured, close up the device’s casing. Re-plug the power source and test the device to ensure that the new harness is functioning correctly.
You’ve now successfully replaced the Bosch 00624610 Potentiometer+Adaptor Harness! Congratulations on completing this DIY project.
Please keep in mind, these instructions are for general guidance and should always be used in conjunction with the manufacturer's manual, if available.


