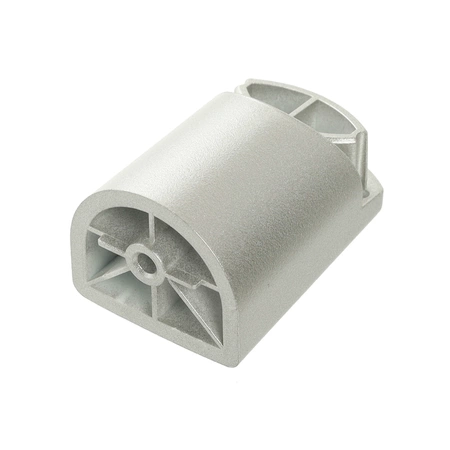
00617262 Bosch Microwave Support

Ensure your oven operates smoothly with the Bosch oven support handle, engineered for precision and durability. Designed specifically for Bosch, Thermador, and Gaggenau appliances, this high-quality handle is a reliable replacement part that restores functionality and aesthetic appeal to your oven. Made with robust materials, it provides a firm grip and withstands everyday use, making it an essential component for seamless cooking experiences. Whether you are performing routine maintenance or tackling a repair, the easy-to-install design saves you time and effort. Maintain your kitchen's efficiency by replacing worn or damaged handles with this dependable product from Bosch. Perfect for both DIY enthusiasts and professional technicians alike.
Weight : 0.16 lbs
Package Dimension : 4.29 x 3.46 x 1.46
Product Details
Reviews
Replaces Parts
Installation Instructions
Compatible Models
Compatible Brands
Ensure your oven operates smoothly with the Bosch oven support handle, engineered for precision and durability. Designed specifically for Bosch, Thermador, and Gaggenau appliances, this high-quality handle is a reliable replacement part that restores functionality and aesthetic appeal to your oven. Made with robust materials, it provides a firm grip and withstands everyday use, making it an essential component for seamless cooking experiences. Whether you are performing routine maintenance or tackling a repair, the easy-to-install design saves you time and effort. Maintain your kitchen's efficiency by replacing worn or damaged handles with this dependable product from Bosch. Perfect for both DIY enthusiasts and professional technicians alike.
Weight : 0.16 lbs
Package Dimension : 4.29 x 3.46 x 1.46
Please Verify Your Purchase to Submit a Review
The following parts are replaced by this product
- 617262
Step 1: Prepare to Replace the Bosch Microwave Handle Spacer Support
Before you start replacing the Handle Spacer Support, gather your tools and supplies, such as a screwdriver, screws, and a new handle support. Ensure you have a clear workspace to work in and disconnect the power source before proceeding.
Step 2: Remove the Old Handle Spacer Support
Using a Phillips screwdriver, loosen and remove the screws that are holding the old handle support in place. Carefully lift and remove the handle support from the door.
Step 3: Clean the Door
Using a damp cloth, clean the area around the hole where the old handle support was located, then dry with a clean, dry cloth.
Step 4: Insert the New Handle Spacer Support
Line up the new handle support in the hole and insert carefully. Secure the handle support with the screws you removed previously, then tighten them with your screwdriver.
Step 5: Test the New Handle Support
Grab the handle and lightly pull it. If the handle moves easily and feels secure, the replacement is complete. If it feels loose, double check that all screws are tightened and properly secured.
Step 6: Reconnect Power Source
Finally, reconnect the power source before closing the door and cleaning off any remaining debris.
Please keep in mind, these instructions are for general guidance and should always be used in conjunction with the manufacturer's manual, if available.


