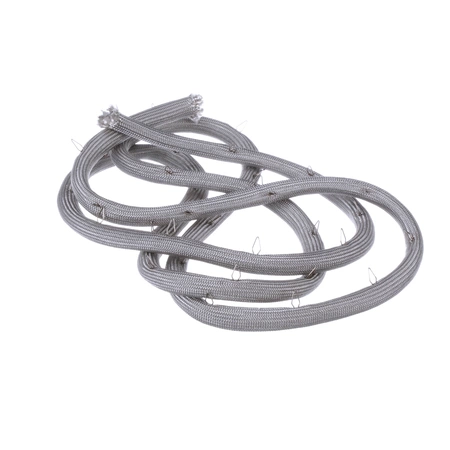
00486767 Bosch Oven Door Seal

Ensure your Bosch oven operates at peak performance with this high-quality door seal. Designed specifically as a replacement for various Bosch models, this gasket provides an effective barrier against heat loss, optimizing energy efficiency while retaining cooking temperatures. Crafted to meet rigorous Bosch specifications, it’s also compatible with Thermador and Gaggenau appliances, making it a versatile choice for a range of ovens.
Replace a worn or damaged seal to improve the cooking experience and prevent heat escape that can lead to uneven baking. This durable component is easy to install and essential for maintaining appliance functionality. Maintain your oven today with reliable parts that ensure long-lasting durability and performance.
Weight : 0.71 lbs
Package Dimension : 8.07 x 6.73 x 1.81
Product Details
Reviews
Replaces Parts
Installation Instructions
Compatible Models
Compatible Brands
Ensure your Bosch oven operates at peak performance with this high-quality door seal. Designed specifically as a replacement for various Bosch models, this gasket provides an effective barrier against heat loss, optimizing energy efficiency while retaining cooking temperatures. Crafted to meet rigorous Bosch specifications, it’s also compatible with Thermador and Gaggenau appliances, making it a versatile choice for a range of ovens.
Replace a worn or damaged seal to improve the cooking experience and prevent heat escape that can lead to uneven baking. This durable component is easy to install and essential for maintaining appliance functionality. Maintain your oven today with reliable parts that ensure long-lasting durability and performance.
Weight : 0.71 lbs
Package Dimension : 8.07 x 6.73 x 1.81
Please Verify Your Purchase to Submit a Review
The following parts are replaced by this product
- 35-00-655
- 486767
- 241901
Instructions on How to Replace a 30-Inch Bosch Range Door Seal Gasket (00486767)
1. Turn off the power supply to your range at the breaker box and turn off the gas supply.
2. Pull the range away from the wall and remove both the lower and upper back panels; these are held in place with screws.
3. Disconnect the wire harness from the main control board located inside the upper cabinet area at the top of the range.
4. Locate the four screws holding the door in place at the bottom of the range and remove them with a screwdriver.
5. Carefully lift the door off of the range and place it on a flat surface.
6. Inspect the seal gasket surrounding the oven door and, using a putty knife, scrape away any residue or dirt that has accumulated around the seal.
7. Remove the old seal by carefully lifting up one edge and pulling it off.
8. Take the new seal (00486767) and fit it around the door frame, making sure that all the edges are firmly in place.
9. Place the door back on the range and secure in place with the four screws.
10. Connect the wire harness to the main controller board, replace the back panels and move the range back into place.
11. Turn the power and gas back on and test the oven to make sure it is working properly.
Please keep in mind, these instructions are for general guidance and should always be used in conjunction with the manufacturer's manual, if available.


