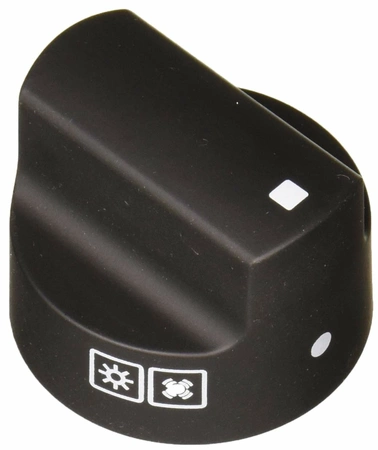
4010123 Bertazzoni Range Electric Black Commutator Knob
Part #: BER 4010123
4010123 Bertazzoni Range Electric Commutator Knob Black
Weight : 0.05 lbs
Package Dimension : 1.85 x 1.77 x 2.28
4010123 Bertazzoni Range Electric Commutator Knob Black
Weight : 0.05 lbs
Package Dimension : 1.85 x 1.77 x 2.28
Please Verify Your Purchase to Submit a Review
DIY Instructions for Replacing a Bertazzoni Range Electric Commutator Knob, Black (Part Number 4010123)
1. Unplug your range. To prevent any risk of electric shock, ensure that your range is unplugged before beginning this repair.
2. Remove the control knob. Use an appropriate screwdriver to loosen and remove the screws that are holding the control knob in place.
3. Disconnect the wiring. Using a flathead screwdriver, carefully pry off the connector caps on the back of the control knob. Once the connectors are exposed, use a pair of needle-nose pliers to disconnect the wiring from the knob.
4. Install the new control knob. Secure the two screws that were used to hold the original knob in place. Then, connect the wiring, feed it through the back of the knob, and secure the connectors.
5. Test your work. Plug in the range and turn on the power. Make sure the new control knob is working correctly by setting the temperature and checking the oven heating element.
6. Finalize installation. Push the new control knob in place, making sure it is securely fastened. Then, enjoy your newly repaired oven!
Please keep in mind, these instructions are for general guidance and should always be used in conjunction with the manufacturer's manual, if available.
No more associated models for this part.


