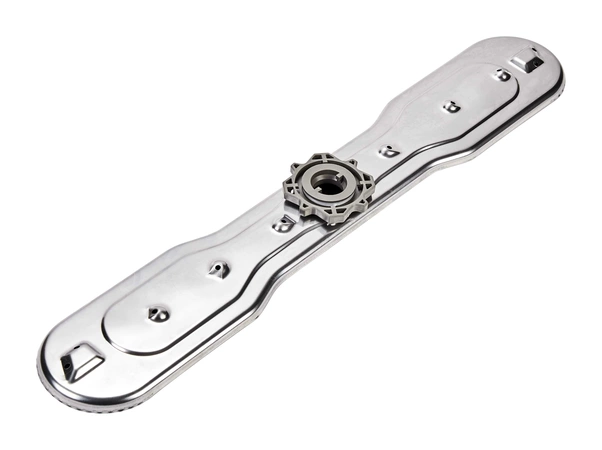
WPW10605345 Whirlpool Dishwasher Spray Arm

Maintain the performance of your refrigerator with this high-quality wash arm, designed specifically to fit a range of major appliance brands, including Whirlpool, Kenmore, and Maytag. Crafted for optimal durability and efficiency, this essential part ensures thorough cleaning and maintenance of your refrigerator's interior. The innovative design supports effective water distribution, allowing for optimal operation and prolonging the life of your appliance. Compatible with Admiral, Amana, Jenn-Air, Magic Chef, Norge, and Roper, this versatile component is perfect for a variety of refrigerator models. Make the smart choice to replace worn or damaged parts with this reliable wash arm to keep your refrigerator running smoothly. Enjoy peace of mind and improved performance with this key refrigerator part.
Weight : 0.94 lbs
Package Dimension : 18.43 x 3.82 x 1.85
Product Details
Reviews
Replaces Parts
Installation Instructions
Compatible Models
Compatible Brands
Maintain the performance of your refrigerator with this high-quality wash arm, designed specifically to fit a range of major appliance brands, including Whirlpool, Kenmore, and Maytag. Crafted for optimal durability and efficiency, this essential part ensures thorough cleaning and maintenance of your refrigerator's interior. The innovative design supports effective water distribution, allowing for optimal operation and prolonging the life of your appliance. Compatible with Admiral, Amana, Jenn-Air, Magic Chef, Norge, and Roper, this versatile component is perfect for a variety of refrigerator models. Make the smart choice to replace worn or damaged parts with this reliable wash arm to keep your refrigerator running smoothly. Enjoy peace of mind and improved performance with this key refrigerator part.
Weight : 0.94 lbs
Package Dimension : 18.43 x 3.82 x 1.85
Please Verify Your Purchase to Submit a Review
The following parts are replaced by this product
- W10605345
Step 1: Locate the Whirlpool Spray Arm - Look for the WPW10605345 located near the bottom of your dishwasher. If you can’t locate it, consult your owner’s manual.
Step 2: Unscrew the Old Whirlpool Spray Arm - Once located, unscrew the old spray arm by turning it counterclockwise with a pair of pliers or wrench.
Step 3: Remove the Old Spray Arm - Take the old spray arm off and set it aside.
Step 4: Prepare the New Spray Arm - Take the new WPW10605345 and make sure it fits your dishwasher by checking the size, shape and hole pattern.
Step 5: Install the New Spray Arm - Place the new spray arm onto the mounting bar, aligning it with the holes. You can use a pair of pliers to help you get it into position.
Step 6: Secure the New Whirlpool Spray Arm - Once the new spray arm is in place, tighten it by turning it clockwise until it is secure.
Step 7: Re-connect Pipes - Reconnect any pipes that were connected to the old spray arm by pushing them back into place.
Step 8: Test the New Spray Arm - Test the new spray arm to make sure it is working properly by running a cycle with dishes.
Please keep in mind, these instructions are for general guidance and should always be used in conjunction with the manufacturer's manual, if available.
No more associated models for this part.


