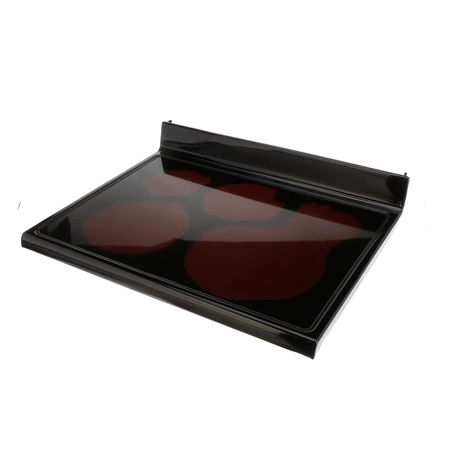
AGU73969713 LG Plate Assembly

Maintain the performance of your LG range with this high-quality plate assembly designed for seamless compatibility. As a genuine LG Electronics part, it ensures reliable functionality and durability, making it an essential addition for any maintenance or repair project. This panel is specifically crafted for LG appliances, guaranteeing a perfect fit and optimal performance. Whether you're upgrading your range or replacing a worn-out component, this plate assembly promises to restore efficiency and prolong the lifespan of your appliance. With its precise engineering, you can trust this part to meet or exceed OEM standards. Ensure your cooking experience remains uninterrupted and efficient by choosing this dependable replacement.
Maintain the performance of your LG range with this high-quality plate assembly designed for seamless compatibility. As a genuine LG Electronics part, it ensures reliable functionality and durability, making it an essential addition for any maintenance or repair project. This panel is specifically crafted for LG appliances, guaranteeing a perfect fit and optimal performance. Whether you're upgrading your range or replacing a worn-out component, this plate assembly promises to restore efficiency and prolong the lifespan of your appliance. With its precise engineering, you can trust this part to meet or exceed OEM standards. Ensure your cooking experience remains uninterrupted and efficient by choosing this dependable replacement.
Please Verify Your Purchase to Submit a Review
Please note: We use this information only to confirm your purchase, it won’t be published.
Step-by-Step Guide to Replacing the LG AGU73969713 Plate Assembly
1. To get started, turn off the power to the appliance and unplug it.
2. Remove any screws or other fasteners that are securing the plate assembly in place.
3. Carefully remove the plate assembly from the appliance, noting any clips or other components that may need to be removed or reattached to the new assembly.
4. Place the new plate assembly into the appliance and secure it with the screws or fasteners.
5. Check for proper fit and alignment, making sure all components fit securely.
6. Reattach any of the components removed earlier.
7. Plug in the appliance and turn the power back on to test the new plate assembly.
8. Enjoy your properly installed plate assembly!
Please keep in mind, these instructions are for general guidance and should always be used in conjunction with the manufacturer's manual, if available.


