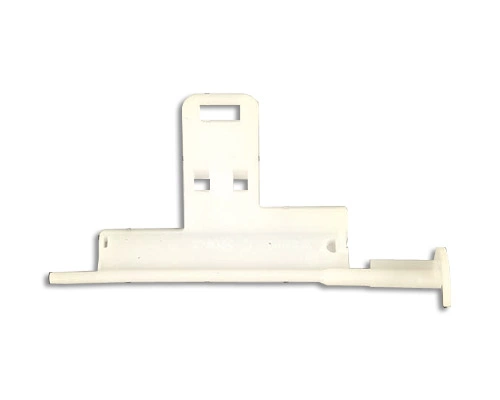
WR17X10706 GE Refrigerator Door Crank Recess

Maintain your refrigerator’s functionality with the WR17X10706 door crank recess, expertly designed for seamless compatibility with various GE models as well as Hotpoint, Haier, Monogram, and Café appliances. This essential dispenser part ensures smooth operation, allowing easy access to your refreshments. Constructed with durable materials to withstand daily use, it enhances the efficiency and longevity of your refrigerator.
Whether you're replacing a worn-out unit or conducting a maintenance check, this door crank recess is a reliable choice. Simple to install, it minimizes downtime and restores your appliance's performance quickly. Keep your refrigerator running smoothly and efficiently with this high-quality component, tailored to meet the demands of modern refrigeration. Transform your kitchen experience today with the assurance of a trusted brand.
Weight : 0.52 lbs
Package Dimension : 5.67 x 4.80 x 1.54
Please Verify Your Purchase to Submit a Review
DIY Instructions for Replacing the WR17X10706 GE Refrigerator Crank Door Recess Handle
1. Start by shutting off the power to your refrigerator, either by unplugging it from the wall or flipping the circuit breaker switch.
2. Open the refrigerator door and remove all items from the door shelf that is directly above the handle.
3. With a Phillips-head screwdriver, unscrew all exposed screws from the exterior frame of the door where the handle mounts.
4. Carefully pull the frame away from the door with your hands and set it aside.
5. Unscrew all screws that are securing the old handle in place, and then carefully remove the old handle.
6. Take the new handle and align it with the holes on the door where the old handle was removed.
7. Screw the new handle in place using the screws that were provided with it.
8. Place the frame back into its original location and secure it using the screws from Step 3.
9. Plug in or turn on the power to your refrigerator and you’re good to go!
Please keep in mind, these instructions are for general guidance and should always be used in conjunction with the manufacturer's manual, if available.


Login and Registration Form