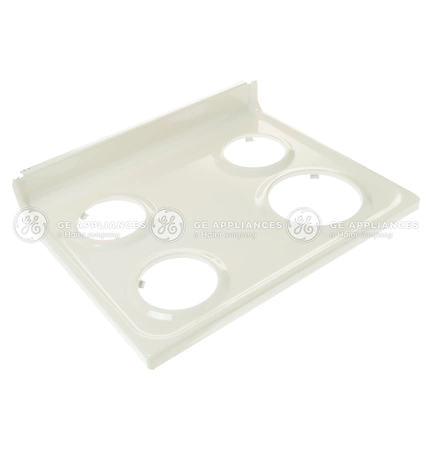
WB62K10081 GE Range Cooktop Assembly Bisque

Maintain your kitchen with this high-quality cooktop assembly designed specifically for various GE appliances, including Hotpoint, Haier, Monogram, and Café models. Crafted with precision, this component ensures a perfect fit and reliable performance, enhancing your oven's functionality. The elegant bisque finish not only complements your kitchen aesthetic but is also durable, resisting wear and tear over time. Easy to install, this part will have your oven operating efficiently in no time, ensuring your culinary creations are cooked to perfection. Ideal for homeowners and professionals alike, this cooktop assembly is a smart choice for anyone looking to maintain or repair their cooking appliance. Keep your kitchen running smoothly with this essential oven part.
Weight : 54.72 lbs
Package Dimension : 33.30 x 28.20 x 8.10
Product Details
Reviews
Replaces Parts
Installation Instructions
Compatible Models
Compatible Brands
Maintain your kitchen with this high-quality cooktop assembly designed specifically for various GE appliances, including Hotpoint, Haier, Monogram, and Café models. Crafted with precision, this component ensures a perfect fit and reliable performance, enhancing your oven's functionality. The elegant bisque finish not only complements your kitchen aesthetic but is also durable, resisting wear and tear over time. Easy to install, this part will have your oven operating efficiently in no time, ensuring your culinary creations are cooked to perfection. Ideal for homeowners and professionals alike, this cooktop assembly is a smart choice for anyone looking to maintain or repair their cooking appliance. Keep your kitchen running smoothly with this essential oven part.
Weight : 54.72 lbs
Package Dimension : 33.30 x 28.20 x 8.10
Please Verify Your Purchase to Submit a Review
The following parts are replaced by this product
- WB62K10043
- WB62K10084
Step 1: Disconnect the power source for the appliance before attempting any repairs.
Step 2: Remove the screws that secure the top of the oven to the base.
Step 3: Carefully lift up the top and take it off from the base.
Step 4: Place the new MAIN TOP (OS1) in place, making sure to align the screw holes with the ones from the old top.
Step 5: Secure the top to the bottom with the removed screws.
Step 6: Reconnect the power source for the appliance once the new MAIN TOP (OS1) has been installed.
Step 7: Test the range to make sure it is functioning properly.
Please keep in mind, these instructions are for general guidance and should always be used in conjunction with the manufacturer's manual, if available.


