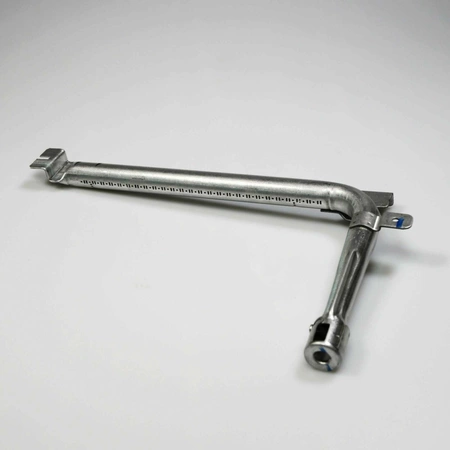
WB16T10022 GE Range Burner Tube

WB16T10022 is an original equipment manufactured (OEM) part. Elevate your cooking experience with the WB16T10022 gas burner tube, a reliable component designed for various GE appliances, including Hotpoint, Haier, Monogram, and Café brands. Engineered for durability and efficiency, this essential part ensures your oven operates smoothly, delivering consistent heat for perfectly cooked meals.
Whether you're replacing a worn-out burner or performing routine maintenance, this high-quality tube is an ideal solution for maintaining optimal oven performance. Its compatibility with multiple brands simplifies your search for the right part, making it a versatile choice for any kitchen.
Ensure that your cooking is never interrupted—invest in the WB16T10022 and enjoy the reliability and precision that GE appliances are known for. This gas burner tube is a must-have for every cooking enthusiast.
Weight : 2.32 lbs
Package Dimension : 19.00 x 10.00 x 1.70
Please Verify Your Purchase to Submit a Review
DIY Guide for Replacing the GE WB16T10022 Burner Oven Bake Assembly
1. Before beginning any repairs on your appliance, be sure to turn off the power to the oven at the circuit breaker.
To do this, locate the switch associated with your oven and flip it to the "off" position.
2. Unplug the oven from the wall outlet and then remove any food that is stored inside.
3. Remove the oven door. To do this, use a screwdriver to remove the two screws located near the hinges at the top of the oven's door. Once the screws have been removed, pull the oven door away from the oven frame.
4. Next, you need to access the burner oven bake assembly. To do this, you must remove the back panel of the oven. To do so, begin by removing the screws located at the bottom of the panel behind the oven. Once these have been removed, slide the panel off the oven frame.
5. With the back panel removed, you should now have access to the bake assembly. Begin by removing the screws securing the assembly in place. Once the screws have been removed, you can then lift the assembly out of the oven.
6. Take the new bake assembly and place it back into the oven. Secure it in place by replacing the screws.
7. Finally, replace the back panel and secure the panel using the screws at the bottom of the oven.
8. Test the oven bake assembly to make sure it is working correctly.
9. Plug the oven back into the wall outlet and turn on the power at the circuit breaker.
Please keep in mind, these instructions are for general guidance and should always be used in conjunction with the manufacturer's manual, if available.


