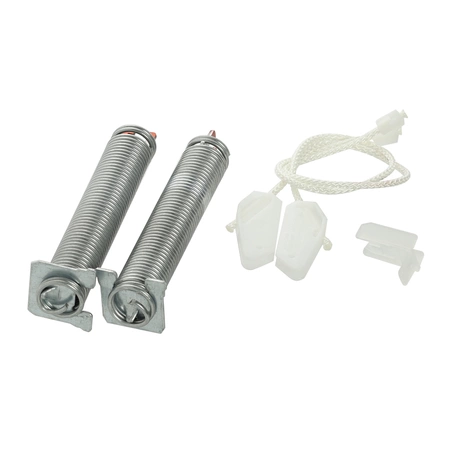
12004119 Bosch Dishwasher Repair Set

Maintain your dishwasher's performance with this essential repair set designed specifically for your Bosch appliance. This hinge replacement ensures a perfect fit and seamless operation, making it compatible not only with Bosch but also with Thermador and Gaggenau models. Crafted for durability, the repair set helps maintain your dishwasher's efficiency, minimizing leaks and improving door alignment for secure closing. Whether you're a DIY enthusiast or a professional technician, this repair set is an invaluable addition to your toolkit. Easily install this part to restore your dishwasher's functionality and extend its lifespan. Keep your kitchen running smoothly with reliable repairs that save time and money.
Weight : 0.43 lbs
Package Dimension : 6.14 x 5.67 x 1.73
Please Verify Your Purchase to Submit a Review
Step 1: Gather the Tools
Before you begin, make sure that you have all of the necessary tools and supplies available. You will need a flathead screwdriver, wire cutters, electrical tape, needle-nose pliers, and the Bosch 12004119 REPAIR-SET.
Step 2: Disassemble the Old Piece
Using the flathead screwdriver, carefully unscrew the cover from the old part and remove any screws holding the pieces together. Carefully remove the screws and set them aside.
Step 3: Clean the Area
To ensure that your new parts fit properly, use a damp cloth to clean the area around the old part before continuing.
Step 4: Replace The Old Part
Unpack the Bosch 12004119 REPAIR-SET and use the included instructions to assemble the piece. Make sure to follow the instructions carefully to ensure that the new part fits properly.
Once the new part has been assembled, use the needle-nose pliers to secure it into place. Use the electrical tape and wire cutters to connect the new part to the existing wiring.
Step 5: Reassemble
Once the new part is securely in place, use the flathead screwdriver to reattach the cover to the new part. Secure the screws to hold it in place.
Step 6: Test
Turn on the power and test the new Bosch 12004119 REPAIR-SET to make sure it is working properly. If the test is successful, then you have successfully completed the replacement.
Congratulations on completing the replacement of your Bosch 12004119 REPAIR-SET!
Please keep in mind, these instructions are for general guidance and should always be used in conjunction with the manufacturer's manual, if available.
No more associated models for this part.


Login and Registration Form