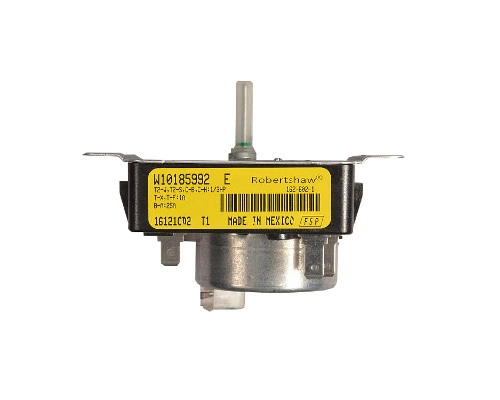
WPW10185992 Whirlpool Timer

Whirlpool WPW10185992 Timer. . We're your #1 source for genuine OEM appliance parts. Contact us for further questions as well as any other appliance parts needs!
Weight : 0.444300 lbs
Dimension : 4.330700 x 4.212500 x 3.385800
Product Details
Reviews 1
Replaces Parts
Installation Instructions
Compatible Models
Compatible Brands
Whirlpool WPW10185992 Timer. . We're your #1 source for genuine OEM appliance parts. Contact us for further questions as well as any other appliance parts needs!
Weight : 0.444300 lbs
Dimension : 4.330700 x 4.212500 x 3.385800
Write Your Own Review
The following parts are replaced by this product
- W10185992
Step 1: Prepare for the Installation
Before you begin the installation process, gather the following tools:
• Phillips head screwdriver
• Needle-nose pliers
• Tape measure
• Flashlight
• Whirlpool WPW10185992 TIMER
Step 2: Unplug the Refrigerator
To avoid electrical shock, unplug the refrigerator from the wall outlet before proceeding.
Step 3: Remove the Panel Cover
Using your Phillips head screwdriver, remove the screws that hold the panel cover of the refrigerator in place. Carefully lift the panel cover and set it aside.
Step 4: Check Connections
Visually inspect all wires and connections in the area where you are replacing the Whirlpool WPW10185992 TIMER. If any wires or connections appear to be loose or damaged, tighten them or secure them with electrical tape.
Step 5: Disconnect Wires
Using your needle-nose pliers, gently disconnect the wires from the back of the old timer. Make sure you note which wires were connected to which terminals, so that you can connect the new timer properly.
Step 6: Install New Timer
Carefully insert the new Whirlpool WPW10185992 TIMER into the opening, making sure that the terminals line up. Then, using your needle-nose pliers, reconnect the wires to the new timer in the same order that they were connected to the old timer.
Step 7: Replace the Panel Cover
Once all the connections have been made, replace the panel cover and secure it in place with the Phillips head screws.
Step 8: Plug in the Refrigerator
Plug the refrigerator back into the wall outlet. Turn the refrigerator on and use your tape measure to confirm that the new timer is working correctly.
Please keep in mind, these instructions are for general guidance and should always be used in conjunction with the manufacturer's manual, if available.
No more associated models for this part.


