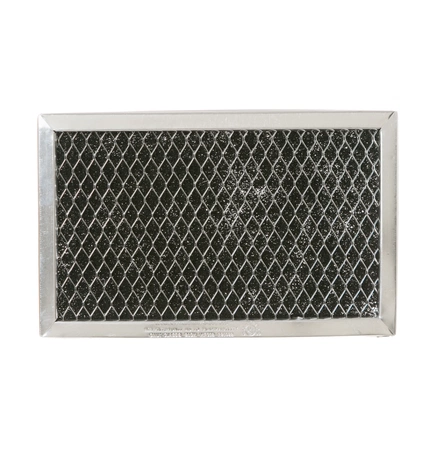
WB02X11536 GE Microwave Charcoal Filter

Maintain the performance of your microwave with this essential charcoal filter designed for optimal air circulation and odor control. Engineered for compatibility with major brands such as GE, Hotpoint, Haier, Monogram, and Café, this filter effectively traps and neutralizes airborne particles to maintain a fresh cooking environment. Ideal for those who value convenience and cleanliness, the charcoal filter is easy to install and ensures your microwave operates at peak efficiency. Whether you are replacing an old filter or performing routine maintenance, this part is specifically tailored for a seamless fit in various microwave models. Trust in this reliable product to keep your kitchen smelling clean and inviting.
Weight : 1.510300 lbs
Dimension : 10.905500 x 7.086600 x 2.716500
Product Details
Reviews
Replaces Parts
Installation Instructions
Compatible Models
Compatible Brands
Maintain the performance of your microwave with this essential charcoal filter designed for optimal air circulation and odor control. Engineered for compatibility with major brands such as GE, Hotpoint, Haier, Monogram, and Café, this filter effectively traps and neutralizes airborne particles to maintain a fresh cooking environment. Ideal for those who value convenience and cleanliness, the charcoal filter is easy to install and ensures your microwave operates at peak efficiency. Whether you are replacing an old filter or performing routine maintenance, this part is specifically tailored for a seamless fit in various microwave models. Trust in this reliable product to keep your kitchen smelling clean and inviting.
Weight : 1.510300 lbs
Dimension : 10.905500 x 7.086600 x 2.716500
Write Your Own Review
The following parts are replaced by this product
- WB02X11536-10PK
1. To replace the WB02X11536 GE Microwave Charcoal Filter, you will need a Phillips head screwdriver, a putty knife, and a new charcoal filter.
2. Begin by unplugging the microwave from the wall and locating the filter, which is usually located behind a vent grille on the top or side of the appliance.
3. Use the putty knife to gently pry off the vent grille, being careful not to scratch or damage the appliance.
4. Once the grille is removed, unscrew the existing filter and discard it.
5. Take the new filter and align the edges with the filter housing before inserting it.
6. Secure the filter in place using the supplied screws.
7. Replace the vent grille and plug the microwave back in before testing.
Please keep in mind, these instructions are for general guidance and should always be used in conjunction with the manufacturer's manual, if available.


